DIY - SMLE No4 Mk1 Firing Pin Tool |
Post Reply 
|
| Author | |
micrometer 
Newbie 
Joined: December 26 2023 Location: Rocky Mtn, USA Status: Offline Points: 18 |
 Post Options Post Options
") Thanks(0) Thanks(0)
 Quote Reply Quote Reply
 Topic: DIY - SMLE No4 Mk1 Firing Pin Tool Topic: DIY - SMLE No4 Mk1 Firing Pin ToolPosted: December 31 2023 at 8:25pm |
|
I recently wanted to tear down my rifle and when I got to bolt disassembly I did not have a firing pin removal tool so I decided to fabricate one. I'm sure there are other ways to skin a cat but this is my version. I hope it's useful for others.
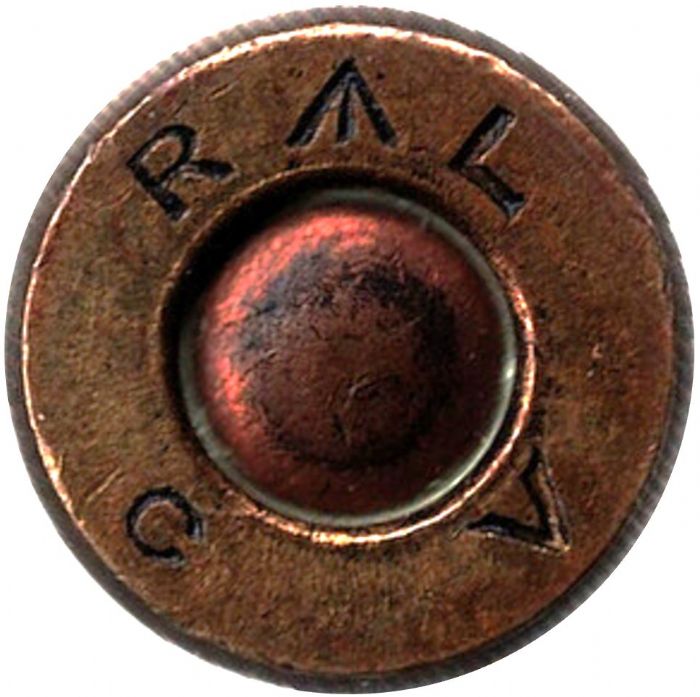
1. Use 2 x .223 cases and cut the shoulders and web off. 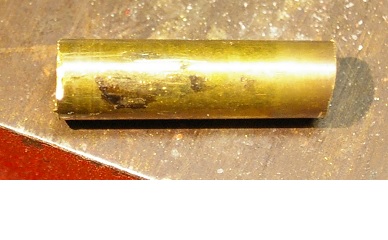 2. Split one case lengthwise (dremel cut off wheel). 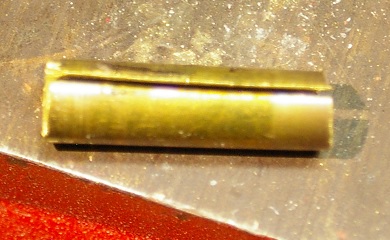 a. bend this so it tucks within itself to make the diameter smaller. b. this will allow it to be epoxied into the other non-split case and both webs will be opposite of one another on each end. c. Cut the ears on one of the ends to fit the firing pin cut outs. The web part of the case is quite strong.  3. drill the primer hole larger so the firing pin can freely pass through. 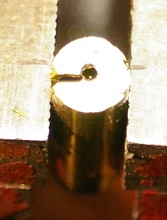 4. Use one 10mm case and split it lengthwise half way. Drill a through hole at the web for a handle. 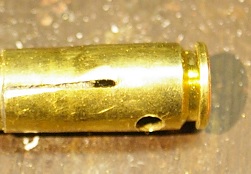 a. Again bend it within itself so the .223 case can be epoxied inside of it. 5. Completed tool.  Pretty crude looking tool but it's functional. Regards, Mike
|
|
 |
|
|
Sapper740
Senior Member 

Joined: July 15 2021 Location: Texas Status: Offline Points: 1737 |
Post Options
Thanks(0)
Quote Reply
Posted: January 01 2024 at 5:08am |
|
I love it when people come up with their own fixes for stuff like this.
|
|
|
|
|
Zed
Special Member 

Donating Member Joined: May 01 2012 Location: France Status: Offline Points: 6460 |
Post Options
Thanks(0)
Quote Reply
Posted: January 01 2024 at 7:24am |
|
Necessity is the mother of invention!
I would only add that the material chosen, may be fragile when up against a stuck firing pin! Having personally broken a bought steel removal tool. I can confirm that sometimes they are tricky to remove.
|
|
|
It's nice to be important, but it's more important to be nice!
|
|
|
|
|
micrometer
Newbie
Joined: December 26 2023 Location: Rocky Mtn, USA Status: Offline Points: 18 |
Post Options
Thanks(0)
Quote Reply
Posted: January 01 2024 at 8:22am |
|
If I were an armorer I would purchase a better tool.
In my case, I may only use it one more time upon reassembly. I did already have just one .223 case with the ears cut out. The ears sheared right off when I used it so I knew it had to be stronger. Necessity stepped in.
|
|
|
|
|
A square 10
Special Member

Donating Member Joined: December 12 2006 Location: MN , USA Status: Offline Points: 16998 |
Post Options
Thanks(0)
Quote Reply
Posted: January 02 2024 at 8:47am |
|
i like it , seems a lot of work but then again as you will only use it a couple times the need outweighed the expense of the purchased tool ,
|
|
|
|
|
Shamu
Admin Group

Logo Designer / Donating Member Joined: April 25 2007 Location: MD, USA. Status: Offline Points: 20510 |
Post Options
Thanks(0)
Quote Reply
Posted: January 02 2024 at 12:20pm |
|
I've seen them made by grinding down the "pointy End", to leave the 2 "pins" of a deep well socket that slides inside the bolt.
|
|
|
Don't shoot till you see the whites of their thighs. (Unofficial motto of the Royal Air Force)
|
|
|
|
|
micrometer
Newbie
Joined: December 26 2023 Location: Rocky Mtn, USA Status: Offline Points: 18 |
Post Options
Thanks(0)
Quote Reply
Posted: January 03 2024 at 6:14pm |
That would be much stronger than my version.
|
|
|
|
|
Shamu
Admin Group
Logo Designer / Donating Member Joined: April 25 2007 Location: MD, USA. Status: Offline Points: 20510 |
Post Options
Thanks(0)
Quote Reply
Posted: January 04 2024 at 10:25am |
|
But a much longer slower process probably! It takes a while to Dremel hardened steel when allowing it to cool several times so it doesn't lose temper!
 |
|
|
Don't shoot till you see the whites of their thighs. (Unofficial motto of the Royal Air Force)
|
|
|
|
|
Mayhem
Senior Member
Joined: February 06 2016 Location: Australia Status: Offline Points: 335 |
Post Options
Thanks(0)
Quote Reply
Posted: January 06 2024 at 5:22am |
|
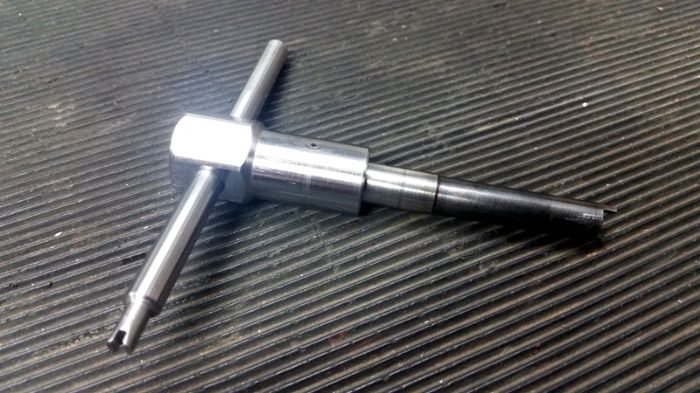
Here is mine. Made of O1 tool steel, which was hardened and tempered, and 4140. The notch in the handle is for the front sight blade screw. Since this picture was taken it has been heated and dunked in used engine oil to blacken it and prevent rust.
 |
|
|
.303 - Helping Englishmen express their feelings since 1889
|
|
|
|
|
Shamu
Admin Group
Logo Designer / Donating Member Joined: April 25 2007 Location: MD, USA. Status: Offline Points: 20510 |
Post Options
Thanks(0)
Quote Reply
Posted: January 06 2024 at 12:44pm |
|
Out of curiosity what temp did you heat it to?
|
|
|
Don't shoot till you see the whites of their thighs. (Unofficial motto of the Royal Air Force)
|
|
|
|
|
Mayhem
Senior Member
Joined: February 06 2016 Location: Australia Status: Offline Points: 335 |
Post Options
Thanks(0)
Quote Reply
Posted: January 06 2024 at 2:38pm |
|
I made this over 10 years ago but if I recall correctly, I heated to cherry red and quenched in oil. Polished and then heated up to straw and left to cool slowly in a bucket of ash. Because I worked off of colour changes, the polishing was done to take the piece back to bright, so I could see the colour change.
|
|
|
.303 - Helping Englishmen express their feelings since 1889
|
|
|
|
|
Post Reply
|
|
| Tweet |
| Forum Jump | Forum Permissions You cannot post new topics in this forum You cannot reply to topics in this forum You cannot delete your posts in this forum You cannot edit your posts in this forum You cannot create polls in this forum You cannot vote in polls in this forum |


 Topic Options
 Shamu wrote: