No4 Fazerkeley Mk2
Printed From: Enfield-Rifles.com
Category: Enfields
Forum Name: Enfield Gunsmithing
Forum Description: Submit any how-to's or other gunsmithing suggestions here.
URL: http://www.enfield-rifles.com/forum_posts.asp?TID=11286
Printed Date: March 26 2026 at 3:39pm
Software Version: Web Wiz Forums 12.07 - https://www.webwizforums.com
Topic: No4 Fazerkeley Mk2
Posted By: FlyPiper907
Subject: No4 Fazerkeley Mk2
Date Posted: March 06 2021 at 9:03pm
|
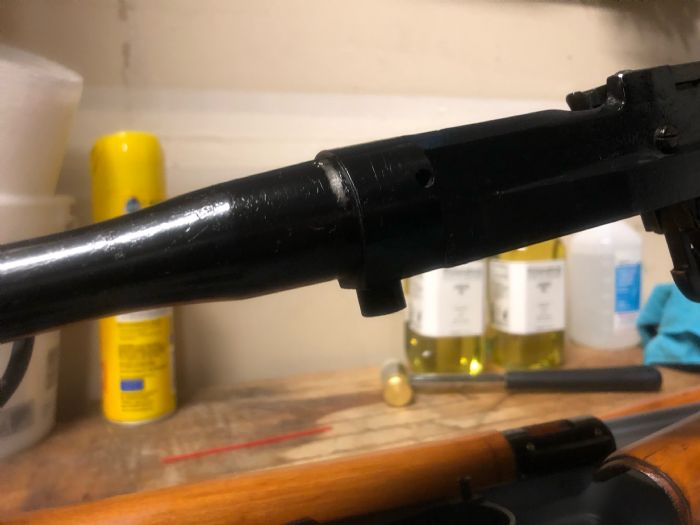
Howdy all, After opening up my No5, I got curious and took my No4 apart for linseed treatments. I've been reading and watching a ton of new material since I first got the No4 and noticed the internals are quite different (inexperience? Guilty!) I took a couple of photos that maybe some of you can help me with. I'm just curious if everything looks normal to you guys here. I still haven't shot it yet but I'm curious: does all of this look normal for a Fazerkely Mk2? |
Replies:
Posted By: FlyPiper907
Date Posted: March 06 2021 at 9:11pm
Also, I noticed there's not a pillar screw in this thing but there is some sort of material that came out with the action screw.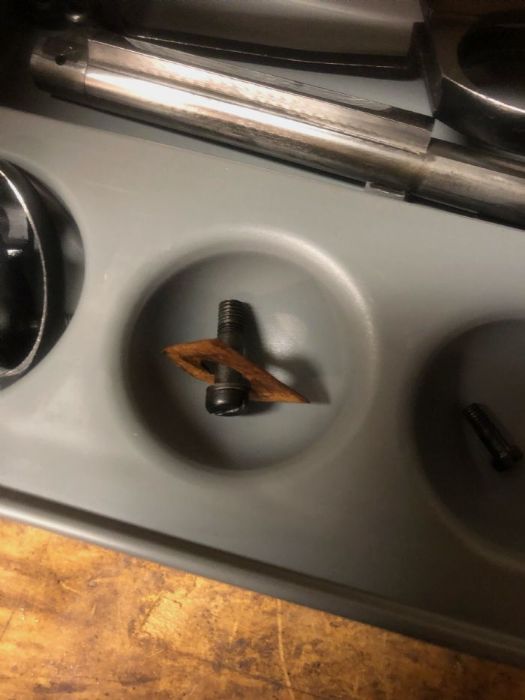 |
Posted By: FlyPiper907
Date Posted: March 06 2021 at 9:16pm
|
Posted By: Shamu
Date Posted: March 07 2021 at 10:05am
|
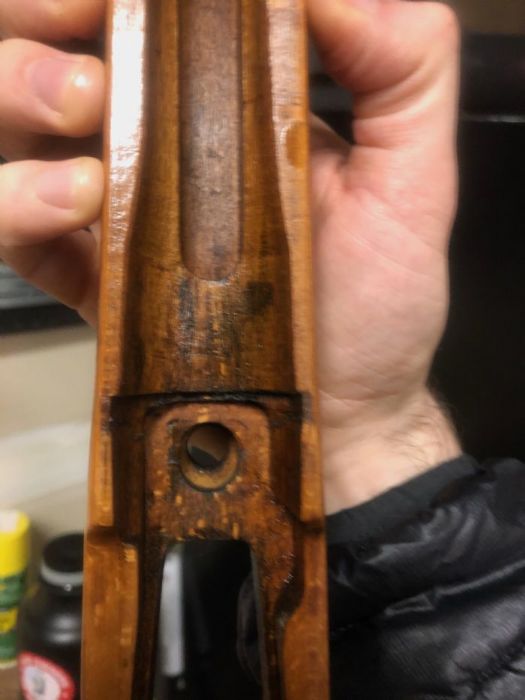
That is not "normal", or "Issue"! there was an accurizing trick with a metal spacer fitted between the top of the bottom metal & the fore-stock bottom, bit thats not it. There definitely should be the pillar. ------------- Don't shoot till you see the whites of their thighs. (Unofficial motto of the Royal Air Force) |
Posted By: FlyPiper907
Date Posted: March 07 2021 at 10:13am
| Gotcha. Where would a guy find a proper Mk2 pillar for one of these things? Does everything else look okay in there? |
Posted By: FlyPiper907
Date Posted: March 07 2021 at 10:14am
| Shamu, also, if you look at the screw closely, there appears to be a washer between the screw head and where it would fit into the wood. I guess I’m having trouble understanding what you mean. |
Posted By: Zed
Date Posted: March 07 2021 at 10:31am
|
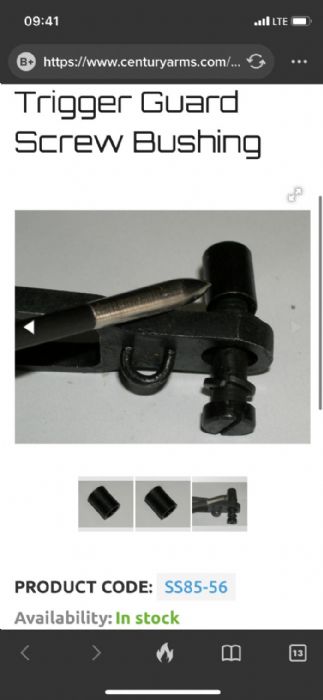
FlyPiper907. If you need a spacer for the main screw, PM me your details. I'll send you one. I bought a box of 10 of these a few months back; because I was missing one from my L39. So have a few spare! ------------- It's nice to be important, but it's more important to be nice! |
Posted By: FlyPiper907
Date Posted: March 07 2021 at 10:43am
|
Posted By: Zed
Date Posted: March 07 2021 at 12:15pm
|
That's it! ------------- It's nice to be important, but it's more important to be nice! |
Posted By: FlyPiper907
Date Posted: March 07 2021 at 12:21pm
| Cool, I’ve been hearing these may need to be professionally fitted. Is there any truth to that or is it a “one size fits all thing”? Assuming it’s t he latter, how do I know when it’s tight enough? |
Posted By: FlyPiper907
Date Posted: March 07 2021 at 12:39pm
| Again, I appreciate all your guys’ help and am really sorry about all of the questions. I’m working from a fairly remote location (Alaska) and my experience is limited. I’m trying to become self-sufficient in working on these things properly without screwing anything up; my current “cirriculum” consists of Riflechair’s videos and this forum. Local knowledge here in Alaska seems quite limited, even with the local gunsmiths. Thanks again, guys. |
Posted By: britrifles
Date Posted: March 07 2021 at 12:48pm
|
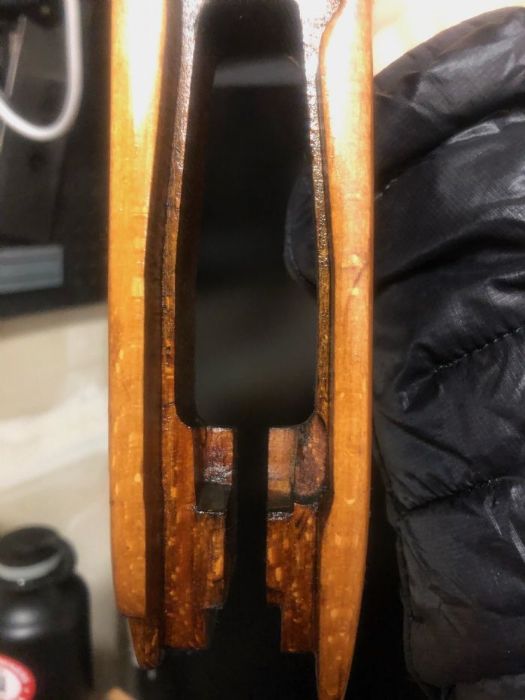
There is a bit of a trick to fitting one. If it is too long, the action body and chamber reinforce will not be contacting the forend. It must make firm contact at these locations. Install the bushing and tighten the main screw. See I if the barreled action can move up and down in the forend (it probably will). If it does, the bushing is too long and you need to file one end of it. But don’t over do it, if you file it too short, it will not serve its purpose. When you get it close (removed all vertical movement of the barreled action in the forend) remove the bushing and snug up the main screw. Mark the location on the main screw where it tightens to a reference point on the trigger guard, then fit the bushing and tighten the screw. You want the screw to tighten up on the bushing at the same point, or slightly before, it tightened up without the screw. |
Posted By: Shamu
Date Posted: March 07 2021 at 1:20pm
|
Not the washer as shown in the pic of the main screw. Its a flat shaped sort of rectangular plate. It was only used as part of a match accurizing process so you probably don't have one. It fills the space at the front end of the trigger guard so its about the same size & shape as the recess. ------------- Don't shoot till you see the whites of their thighs. (Unofficial motto of the Royal Air Force) |
Posted By: FlyPiper907
Date Posted: March 07 2021 at 2:03pm
|
Shamu, You’re saying this rifle doesn’t need a pillar?
|
Posted By: FlyPiper907
Date Posted: March 07 2021 at 2:06pm
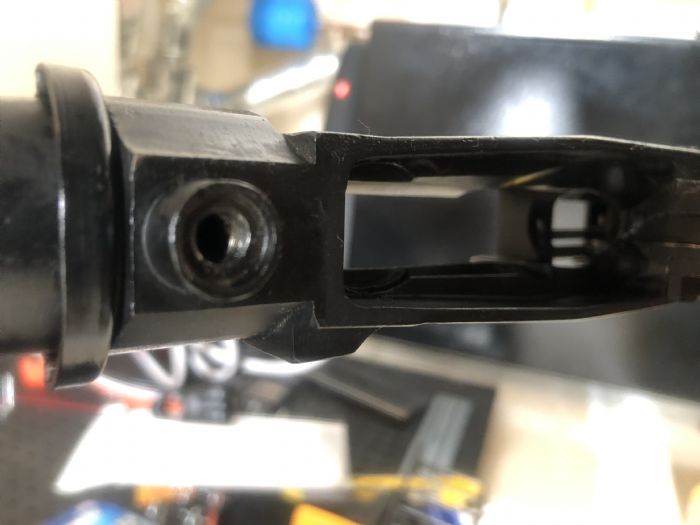 Here’s a better view of where that screw goes when it’s all together: Here’s a better view of where that screw goes when it’s all together: |
Posted By: britrifles
Date Posted: March 07 2021 at 2:27pm
|
Some rifles that were set up for competition had the bushing removed and the trigger guard is shimmed up to give larger contact surface with the forend. My Fulton Regulated No. 4 has this configuration. Because of this, I don’t leave the main screw tightened while in storage. |
Posted By: Shamu
Date Posted: March 07 2021 at 2:38pm
|
Not at all. its part of a far more complex set of mods for competition shooting. Let me see if I can find the info. OK. Normal bedding (what you want/need)  ------------- Don't shoot till you see the whites of their thighs. (Unofficial motto of the Royal Air Force) |
Posted By: Shamu
Date Posted: March 07 2021 at 2:46pm
|
Custom match bedding (part of it at least) which I don't think you need: There are also lots of stock mods (not shown) needed to use this system.  ------------- Don't shoot till you see the whites of their thighs. (Unofficial motto of the Royal Air Force) |
Posted By: FlyPiper907
Date Posted: March 07 2021 at 3:52pm
| Got it. I’ll work on getting a screw here. In the mean time, is it alright to reassemble the rifle while I wait? Silly question, just making sure I’m not missing something I’m not seeing. |
Posted By: Shamu
Date Posted: March 08 2021 at 8:24am
|
I think you have the screw & washer (the one with the mystery bit on it). All you really need is the pillar & some hand fitting. You could lightly reassemble using that minus the "pad thingy" for now just don't really snug it up tight without the pillar fitted. ------------- Don't shoot till you see the whites of their thighs. (Unofficial motto of the Royal Air Force) |
Posted By: Zed
Date Posted: March 08 2021 at 12:07pm
|
If you are new to Lee Enfields and also wanting to work on the rifle; I would suggest you read up on the articles written by Captain Peter Laidler. Retired British Army armourer. All of his articles are available to be found on the "Milsurps" forum. They can be downloaded in PDF format free of charge. Also there is a book by Roger Wadham; Accurising "The 2012 Complete Book on Lee Enfield Accurizing". It cover's standard and target rifle set up. It's a useful book. These will help you if there's no local Armourer with experience in these rifles. I have used a combination of these sources to learn these rifles. You are lucky that your rifle is a No4Mk2; because the trigger is suspended from the receiver. So fitting the spacer is quite straight forward; it's just a matter of working out the correct length to give the correct "crush" on the fore end. On a No4Mk1, the trigger is suspended on the trigger guard. The length of the spacer can affect the trigger pull off. There are lot's of interesting stuff to learn; so welcome to the club! ------------- It's nice to be important, but it's more important to be nice! |
Posted By: FlyPiper907
Date Posted: March 08 2021 at 12:12pm
| Thanks, Zed. I can wait on that part too so just PM me when you’re back in range and I’ll get you an address. Thanks again for the help, guys. Sounds like I’ve got quite a bit more reading to do! I’ll post updates as they come 🤙 |